바이너리로 설치
These instructions are for special use cases. For most users, Quick Install shows the best way to install Sui.
각 Sui 릴리스는 여러 운영 체제를 위한 binary 집합을 제공한다.
이 binary를 GitHub에서 다운로드해 Sui를 설치할 수 있다.
- Linux
- macOS
- Windows
-
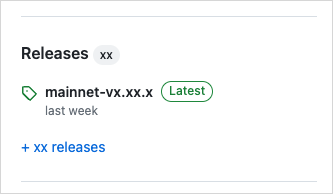
오른쪽 패널에서 Releases 섹션을 찾는다.
-
Latest 태그가 붙은 릴리스를 클릭해 해당 릴리스 페이지를 연다.
-
릴리스의 Assets 섹션에서 운영 체제에 맞는
.tgz압축 파일을 선택한다. -
.tgz파일의 모든 파일을 시스템의 원하는 위치에 압축 해�제한다. 이 지침은 설명을 위해 시스템 사용자 루트의sui폴더에 파일을 추출한다고 가정한다. 다른 디렉터리를 선택했다면 이후 단계에서 이 위치에 대한 참조를 바꾼다. -
압축을 푼 폴더로 이동한다. 다음과 같이 추출된 파일이 있어야 한다:
Name Description move-analyzerLanguage Server Protocol implementation. suiMain Sui binary. sui-bridgeSui native bridge. sui-data-ingestionCapture full node data for indexer to store in a database. sui-faucetLocal faucet to mint coins on local network. sui-nodeRun a local node. sui-test-validatorRun test validators on a local network for development. sui-toolProvides utilities for Sui. -
추출된 파일이 들어 있는 폴더를
PATH변수에 추가한다. 이를 위해~/.bashrc를 업데이트하여 Sui binary 위치를 포함시킬 수 있다. 권장 위치를 사용한다면export PATH=$PATH:~/sui를 입력하고 Enter를 누른다. -
새 터미널 세션을 시작하거나
source ~/.bashrc를 입력하여 새PATH값을 로드한다.
-
오른쪽 패널에서 Releases 섹션을 찾는다.
-
Latest 태그가 붙은 릴리스를 클릭해 해당 릴리스 페이지를 연다.
-
릴리스의 Assets 섹션에서 운영 체제에 맞는
.tgz압축 파일을 선택한다. -
.tgz파일의 모든 파일을 시스템의 원하는 위치에 압축 해제한다. 이 지침은 파일을 시스템 사용자 루트의sui폴더에 추출한다고 가정한다. 다른 디렉터리를 선택했다면 이후 단계에서 이 위치에 대한 참조를 바꾼다. -
압축을 푼 폴더로 이동한다. 다음과 같이 추출된 파일이 있어야 한다:
Name Description move-analyzerLanguage Server Protocol implementation. suiMain Sui binary. sui-bridgeSui native bridge. sui-data-ingestionCapture full node data for indexer to store in a database. sui-faucetLocal faucet to mint coins on local network. sui-nodeRun a local node. sui-test-validatorRun test validators on a local network for development. sui-toolProvides utilities for Sui. -
추출된 파일이 들어 있는 폴더를
PATH변수에 추가한다. 이를 위해~/.zshrc또는~/.bashrc를 업데이트하여 Sui binary 위치를 포함시킬 수 있다. 권장 위치를 사용한다면export PATH=$PATH:~/sui를 입력하고 Enter를 누른다. -
새 console 세션을 시작하거나
source ~/.zshrc(또는.bashrc)를 입력하여 새PATH값을 로드한다. -
처음 binary를 실행하는 경우 MacOS에서 binary 실행을 막는 오류를 받을 수 있다. 이 오류를 받으면 dialog를 닫고 console에
xattr -d com.apple.quarantine ~/sui/*를 입력한 뒤 Enter를 누른다(경로가 다르면 반드시 조정한다).
-
오른쪽 패널에서 Releases 섹션을 찾는다.
-
Latest 태그가 붙은 릴리스를 클릭해 해당 릴리스 페이지를 연다.
-
릴리스의 Assets 섹션에서 운영 체제에 맞는
.tgz압축 파일을 선택한다. -
.tgz파일의 모든 파일을 시스템의 원하는 위치에 압축 해제한다. 이 지침은 설명을 위해 C 드라이브 루트의sui폴더에 파일을 추출한다고 가정한다. 다른 디렉터리를 선택했다면 이후 단계에서 이 위치에 대한 참조를 바꾼다.정보Windows는
.tgz파일을 기본으로 지원하지 않지만 7Zip 같은 무료 압축 파일 앱을 사용해 압축을 풀 수 있다. -
압축을 푼 폴더로 이동한다. 다음과 같이 추출된 파일이 있어야 한다:
Name Description move-analyzerLanguage Server Protocol implementation. suiMain Sui binary. sui-bridgeSui native bridge. sui-data-ingestionCapture full node data for indexer to store in a database. sui-faucetLocal faucet to mint coins on local network. sui-nodeRun a local node. sui-test-validatorRun test validators on a local network for development. sui-toolProvides utilities for Sui. -
추출된 파일이 들어 있는 폴더를
PATH변수에 추가한다. Windows version에 따라 설정 창으로 가는 방법은 여러 가지가 있다. 모든 Windows version에서 동작하는 한 방법은 console에sysdm.cpl을 입력해 System Properties 창을 여는 것이다. Advanced 탭에서 Environment Variables... 버튼을 클릭한다. -
Environment Variables 창에서
Path변수를 선택하고 Edit... 버튼을 클릭한다. -
Edit environment variable 창에서 New를 클릭하고 압축을 푼 폴더 경로를 추가한다. 예시 경로를 사용한다면
C:\sui가 된다. -
OK를 클릭한다.
Build binaries locally
Sui repo를 다운로드하고 binary를 로컬에서 빌드할 수 있다.
Binary는 target/release 디렉터리로 내보내진다.
$ cargo build --profile release --bin sui
필요에 따라 다른 package도 포함한다.
| Name | Description |
|---|---|
move-analyzer | Language Server Protocol implementation. |
sui | Main Sui binary. |
sui-bridge | Sui native bridge. |
sui-data-ingestion | Capture full node data for indexer to store in a database. |
sui-faucet | Local faucet to mint coins on local network. |
sui-node | Run a local node. |
sui-test-validator | Run test validators on a local network for development. |
sui-tool | Provides utilities for Sui. |
Upgrade from Cargo
이전에 Sui binary를 설치했다면 설치에 사용했던 것과 같은 명령으로 가장 최신 릴리스로 업데이트할 수 있다(testnet은 원하는 branch로 변경한다):
$ cargo install --locked --git https://github.com/MystenLabs/sui.git --branch testnet sui --features tracing
tracing feature는 Sui CLI에서 Move test coverage와 debugger 지원을 활성화한다.
tracing을 활성화하지 않으면 이 기능을 사용할 수 없다.
Install sui-node for Ubuntu from AWS
The sui-node binary from AWS only supports Ubuntu version 22.04.
The sui-node binaries for Ubuntu 22.04 are available for download from AWS. You can use either the commit SHA or version tag in the URL to retrieve the specific version of Sui you want. Use one of these values to construct the AWS download URL.
The URL is in the form:
https://sui-releases.s3-accelerate.amazonaws.com/<SHA-OR-TAG>/sui-node
Replace <SHA-OR-TAG> with the proper value. For example, the URL is https://sui-releases.s3-accelerate.amazonaws.com/00544a588bb71c395d49d91f756e8bfe96067eca/sui-node to download the release with the relevant commit SHA. If you visit the URL using a browser, the binary downloads automatically.
After downloading, open a console to the file's location and change its permission to 755.
$ chmod 755 sui-node
Add the file's location to your $PATH variable if its directory is not already included. Follow the steps in Configure a Sui full node to complete the setup.